Fletcher
Intro
Fletcher is a "time smoother", and "ballistics contouring" audio effect, designed to work with the AU, AAX and VST3 plugin standards, on Windows & Mac OS. This manual serves as a full explanation into every parameter and system featured within the scope of the plugin. It will be updated along with the program itself. Assume that this manual is representing the latest version of the plugin available on our website.
Be sure to check out the Common Features page to learn about capabilities that every Lese plugin has.
Basics
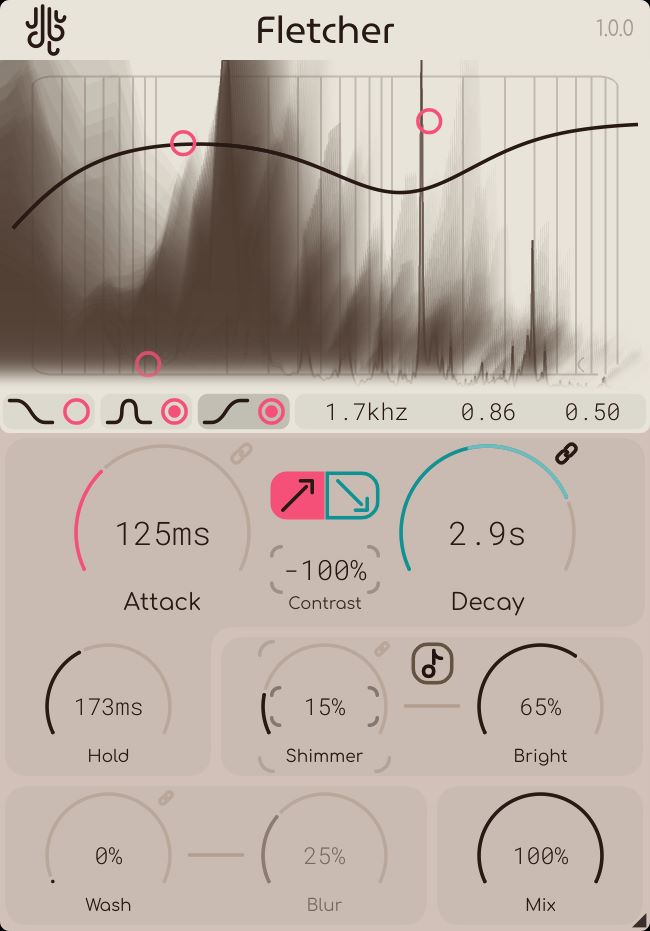
Fletcher processes audio spectrally, doing a variety of different operations before being outputted. The main functionality of Fletcher is to allow for "Time Smoothing", that is, changing the attack and decay of sounds by having the current sound acting as a "target" for fletcher's attack processor to reach over a set amount of time, and adding artificial decay with the "decay" stage of the processing.
Factor Bands
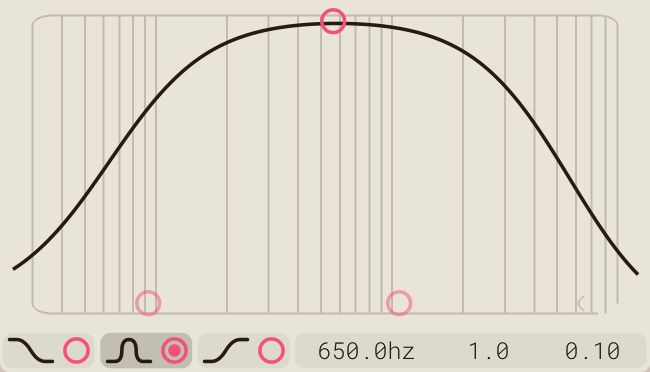
The way that frequency-specific smoothing contouring is handled in Fletcher is with the factor bands system, when working with factor bands, it might look like you are adjusting some kind of internal filter, but what is actually happening is that the line that the controls make is used to determine frequency-specific adjustments. This system is also available in our other plugins, like Smear, and Sweep.
Sidechain Modulation
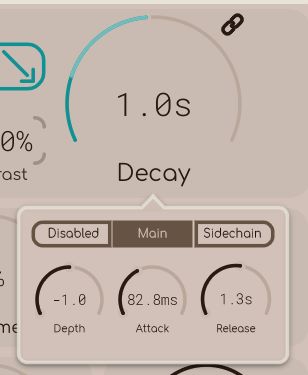
Right-clicking on any knob with a "chain" icon in the top-right of the knob will open up the Sidechain Modulation menu. This allows either an external sidechain input, or the sound already passing through to be used as basis for modulating the value of the given parameter. You can also change the attack & decay times to use for this modulation
Contouring Controls
Controls are listed from top to bottom, for clarity's sake.
Attack
The "Attack" control changes the maximum time that the factor bands can set the attack time to. Please note though that this sets a maximum value, so if you have all of the factor bands turned down to nothing and adjust this control, it will do nothing.
Decay
The "Decay" control changes the maximum time that the factor bands can set the decay time to, similarly to the Attack control. Once again, this sets a maximum value.
Additionally, in the case of the decay processor only, the low-end of the frequency spectrum is not processed (80hz and below). This was done to avoid the output signal being overly muddy in some cases.
Attack / Decay Switch
The attack and decay switch in between the Attack / Decay controls switches which factor band controller is visible. Switching between the two views has no effect on the sound.
Hold
The "Hold" knob underneath the Attack knob adds another layer of time contouring. Turning this up makes individual bins that have completed their attack phase and are set to go down in volume stay for a bit longer, determined by the Hold time.
Turning this up can make sounds stay around for a lot longer than they normally would.
Extra Controls
Contrast
The Contrast control essentially alters the spectral tone. Internally, peaks that are louder than others (or "contrast" from the rest) can be artificially boosted using this control.
Alternatively, the contrast can be turned down by bringing the value into the negatives, which makes the whole signal have less apparent tonality (i.e it usually makes the signal noisier, as the non-contrasting tones are being brought out).
Shimmer
The Shimmer knob adds extra harmonics to the signal based on pitch detection. Turning this control up makes those extra harmonics louder, and turning up the "Bright" knob makes more high-frequency harmonics be generated.
Key Tracking
The shimmer processor can also take in external MIDI notes to use as the basis for the harmonic generation, instead of using pitch detection. Pressing the button in between the "Shimmer" and "Bright" knobs turns this feature on, Allowing you to "play" the shimmer effect yourself.
Wash
The "Wash" knob makes the outputted sounds phase less coherent, and modulates the volume of each frequency slightly, essentially making the sound into a "noisy" representation of itself.
Blur
Turning up the "Blur" control makes the wash tonality less apparent, so that individual peaks get turned into more general bits of noise.
Mix
Mix is the dry / wet control, which is standard in most audio plugins. Turning it down puts more of the original sound through, and turning it up puts more of the processed sound through.