Hikari
Intro
Hikari is a stochastic reverb and imaginary space simulator designed to work with the AU and VST3 plugin standards, on Windows & Mac OS. This manual serves as a full explanation into every parameter and system featured within the scope of the plugin. It will be updated along with the program itself. Assume that this manual is representing the latest version of the plugin available on our website.
Be sure to check out the Common Features page to learn about capabilities that every Lese plugin has.
Navigator
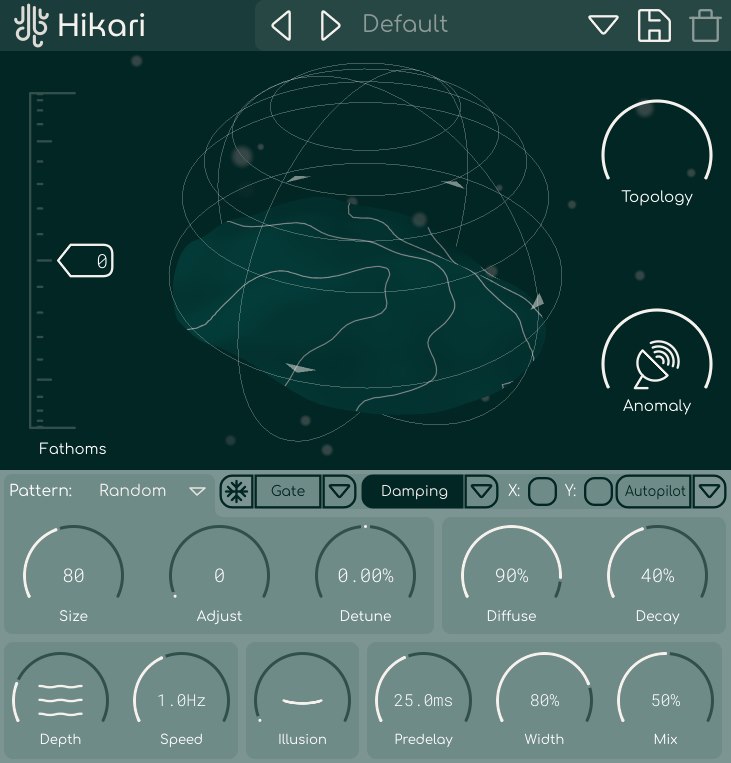
Central to Hikari's interface is the navigator. This is the circular control on the top half of the interface. This displays the active topology based on the X/Y position. You can use the WASD keys, Arrow keys, or the mouse to move around the space.
You can also change the navigator's view by using the right or middle mouse button, and dragging on the component.
Autopilot
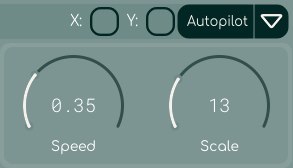
Along with the previous controls, you can also use an autopilot system to adjust the Navigator automatically. The movement of the Navigator can be automated by pressing the "Autopilot" button, and watch as the Navigator's position begins to move on it's own.
Settings
The dropdown button next to the Autopilot button opens to display a few settings. You can change the speed of the automatic movement, as well as the scale of the movement.
Topology
The topology control to the right of the navigator adjusts the "topology" feature. The topology system samples small positions from the terrain around the current position defined in the Navigator and uses them to slightly alter the way that the reverb algorithm behaves.
Anomaly
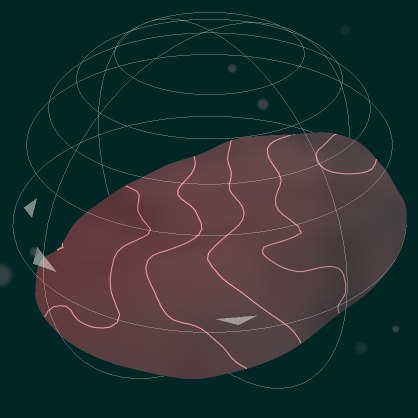
The Anomaly control is another feature that concerns the navigator system. The four arrows that point in different directions, and change when the position of the navigator changes, point to four different anomalies, special areas in the two-dimensional space where the audio is processed differently. Getting close to an anomaly will start to tint the topology in the Navigator to a red color.
When the plugin initializes or switches to a different preset, the anomaly system is re-generated with a new (or pre-determined, stored in the preset) seed value, which adjusts the way that anomalies will behave in that instance of the reverb. Due to the random nature of the anomaly generation, there may be cases where an individual anomalies does a lot and there may be cases where an anomaly does nothing.
Anomalies have three different possible pre-processing effects when the navigator is close to them. Additionally, the anomalies have the ability to heavily alter the reverb algorithm itself.
XY Modulation
The current X/Y position of the navigator can also be used to adjust different reverb parameters. The X and Y buttons next to the "Autopilot" button allow for this. Please see the Common Features "modulation" section to learn how to work with modulation in Lese plugins
If both the Topology & Anomaly controls are turned down to 0, then the XY modulation system is still available to use, but the contour of the terrain at a given position in the Navigator are irrelevant to the sound.
Controls
Fathoms
There is one control on the top panel that directly effects the sound; This is the Fathoms slider. the Fathoms Slider changes the input tone of the sound utilizing a multistage filtering process. Turning the Fathoms value down removes high frequencies, while turning the Fathoms value up removes low frequencies.
Once you go into the extremes of either end of the Fathoms control, the control also introduces some "blurring" via a feedback comb filtering network.
Early Reflections
Hikari has eight early reflections which can be altered with the following controls:
Pattern
Hikari features a number of algorithms for early reflections, which determine their delay / gain distributions, and how they behave with the Adjust control. These patterns are more centred around formulaic systems aside from describing them as how they "feel". i.e instead of calling it a hall, room, etc, we call them as follows:
Patterns List
- Random: Fractal noise pattern. creates organic, evolving early reflections. Adjust controls the temporal evolution of the noise field.
- Linear: Ramp pattern. creates a smooth delay gradient across reflections. Adjust modulates the amplitude envelope.
- Waves: Cyclical wave pattern. creates rhythmic modulation of delays. Adjust shifts the phase of the wave, creating movement.
- Staccato: creates sharp, distinct reflections with minimal delay variation. Adjust controls subtle timing variations & amplitude shifts.
- Exponent: Exponential decay pattern. Tries to mimic natural room acoustics. Adjust controls the decay rate and creates temporal evolution.
- Prime: Golden ratio spiral pattern. creates pleasing spacing. Adjust rotates the spiral and modulates amplitudes.
- Bounce: Bouncing ball pattern. creates rhythmic, accelerating reflections. Adjust controls the bounce frequency and damping.
- Cluster: Groups reflections into distinct clusters. Adjust shifts cluster positions and modulates cluster density.
- Ping: Alternating pattern. creates ping-pong effect between channels. Adjust controls the alternation speed and crossover smoothness.
Size
The Size control adjusts the time multiplier for the early reflections. Turning it down low makes the early reflections appear almost all at once (regardless of pattern), and turning the value up makes the reflections have much longer delay times.
Adjust
Adjust changes how the early reflection pattern behaves. Each pattern that is set has it's own behavior associated with the adjust control. A common use of the adjust control is to route it to the X/Y Modulation values, for added randomness.
Detune
The Detune knob changes the delay times so that they are more out of sync with one another in the left and right channels.
Reverb Tail
Diffuse
The Diffuse control adjusts the amount of diffusive reverb that is used in the process. turning it down to zero removes it completely. The fine tunings of the diffusive sound are another aspect that is determined by the topology of the navigator.
Decay
The Decay knob adjusts the overall length of the reverb's feedback. This control is probably one that has the most noticable effect on the sound when changed.
Modulation
Depth
The Depth knob controls the depth of the modulation of the reverb tail (specifically, the internal FDN).
Speed
The Speed knob controls the speed of the modulation of the reverb tail. This is measured in hz. The reverb tail modulation is cyclical in nature, not random.
Additionally, when the reverb is in a Frozen state, these controls do not alter the sound. The FDN is not modulated in the freeze state.
Illusion
This Illusion knob controls the "illusion" factor. Illusion is a special process that occurs before sound is fed into the reverberator; it is a random granular effect that stores audio in a short buffer before playing bits of it back in reverse (adapted from Slice's looper system). Turning it up increases the effect.
Additionally, the rate at which sound comes in is not guaranteed; there may be some moments where nothing comes through, due to the random nature of the processor (as the rate that it scans through it's internal buffer is also random).
Miscellaneous
Freeze
There is a toggle button for putting the reverb into a frozen state. This can be turned on & off at will.
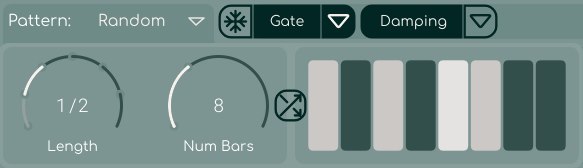
Gated Freeze
Along with togglable freeze, you can also control the freeze with a tempo-synced gating system. The "Gate" button next to the freeze button enables this, and a dropdown can be opened to allow for some freeze gate settings;
Settings
In the gated freeze dropdown, you can adjust the time division that the gating corresponds to, the number of steps, and on the right there is an editor to turn each gate step on or off.
Damping
To the right of those buttons is the damping control. You can turn the internal damping on and off, and the dropdown here allows you to adjust the filter curves of the damping. Damping changes how the reverb tail decays, frequency wise. These filters can only be turned down, not increased, and turning them down makes the relevant part of the frequency spectrum decay faster.
Note that when damping is on and the reverb is frozen, the frozen audio is still passed through the damping filters.
Predelay
The Predelay controls the length of delay between when dry sound comes in and when it is processed by the reverberator. It is measured in milliseconds.
Width
The Width control adjusts the amount of inter-channel crossfeed that occurs in the processing, where 0 percent creates a mono output, and 100% creates a wide stereo effect.
Mix
Mix is the dry / wet control, which is standard in most audio plugins. Turning it down puts more of the original sound through, and turning it up puts more of the processed sound through.